

In today’s fast-paced digital world, a fast-loading website is essential for attracting and retaining visitors. WordPress, as one of the most popular website platforms, offers various tools to enhance site performance, and WP Rocket stands out as a leading optimization plugin. With its user-friendly interface and powerful features, WP Rocket helps WordPress site owners achieve remarkable speed improvements.
At DWB (Dubai Web Design), a premier website design and app design company based in Dubai, we specialize in creating high-performance websites tailored to meet the unique needs of businesses. Leveraging advanced tools like WP Rocket, we ensure that your website not only looks great but also delivers an exceptional user experience. In this article, we’ll guide you through the best settings for optimizing WordPress using WP Rocket to boost your site’s speed and performance.
WP Rocket Tutorial
The first step to using a WordPress plugin is to install and activate it. After installation, WP Rocket will be added to the settings section of the WordPress dashboard under the WP Rocket menu.

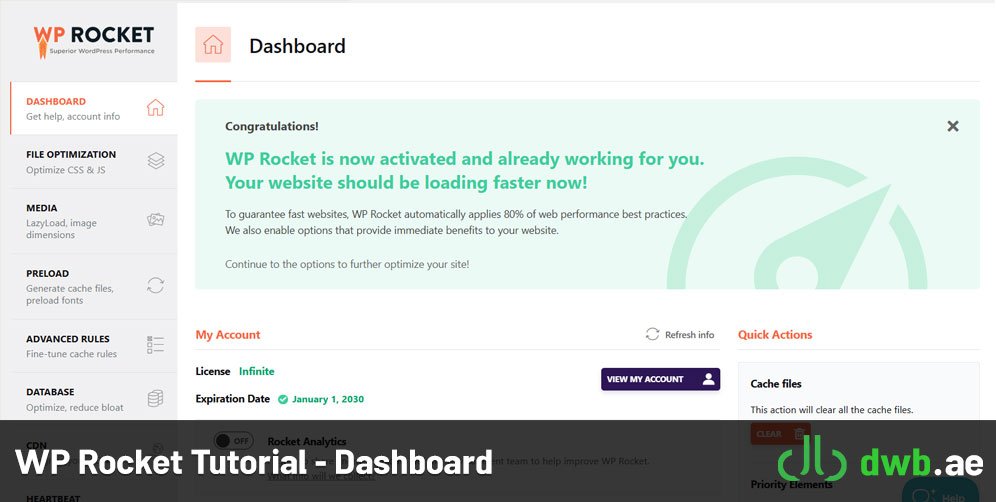
1- WP Rocket Settings Dashboard
In this part of the WP Rocket tutorial, you can see the overall status of the site in the plugin counter section. Additionally, you can perform operations such as clearing cache, starting preload, etc. from the dashboard and quick action section.
2- WP Rocket Cache Settings Tutorial
One of the ways to increase speed with WordPress Rocket is the cache, which is activated for you as soon as the plugin is activated. Cache settings in WP Rocket have several main options: mobile cache, user cache and cache lifetime. Now we will examine each of them one by one. Caching pages is one of the most important ways to optimize WordPress with the WP Rocket plugin, which we will explain below.
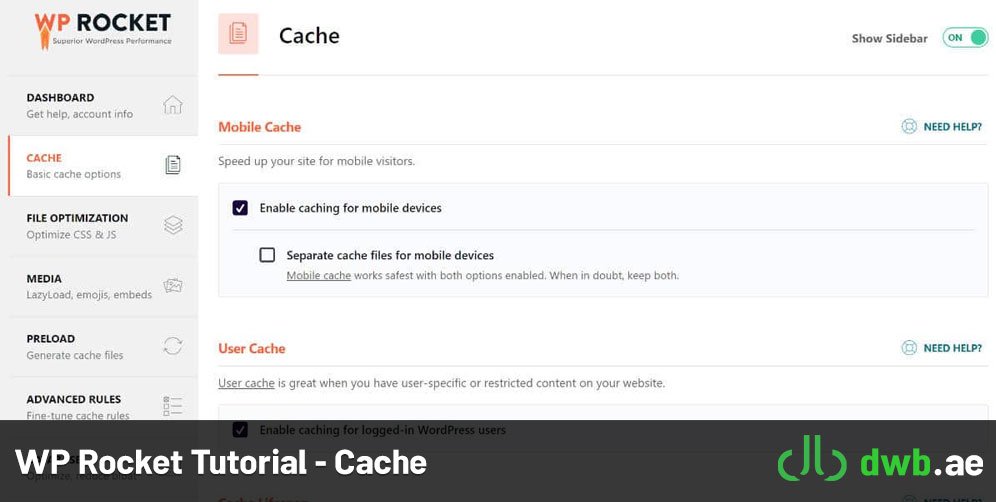
- Mobile cache: If you have a different format or version of the desktop for your mobile, check this box and activate the mobile cache. In this case, the cache will be activated for users who log in with a mobile. This is highly recommended due to Google’s policy regarding importance to mobile users.
- User cache: When user cache is enabled, the Rocket plugin allocates cache for all users who are logged in to the site. Enabling this section is recommended when you have separate content for logged in users. Of course, the speed of logged in users will increase here. If your site is such that each user sees his own content and different information is displayed to each user according to membership levels, activate this section. If the content is dynamic for users and there may be interference, it is better not to tick this section.
Important note: If you use plugins such as WooCommerce, Ticket, etc., it is better to disable the user cache. This is more suitable for blog sites and…
- Cache lifetime: In this section of the WP Rocket tutorial, you can specify the page cache interval. If your content changes quickly and every few hours, it’s better not to enable caching because it puts an extra load on your server. If you want, you can set the cache lifetime for your static pages to 2 days or 48 hours, which will clear the previous cache and load the current cache.
3- WP Rocket File Optimization Settings Tutorial
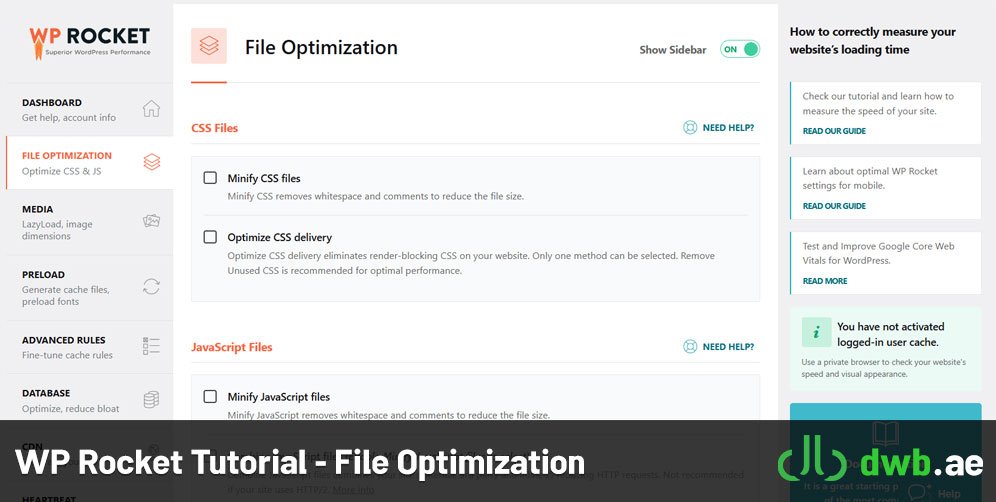
In this part of WP Rocket training, you can optimize HTML, CSS, and JS files, etc. In this way, it reduces the size of JS and CSS files and combines different files and puts them in one file. In fact, with the settings of this section and by compressing and reducing the size of HTML files, Google Fonts, query strings, CSS and JS, you can increase the speed of the site. The settings of this section depend on the style of your template and site, so make the settings accordingly.
Initial settings: In the initial settings, the site’s HTML is compressed, empty spaces and additional phrases are removed, and file sizes are reduced. Also, Google fonts are combined in one file and reduce the number of requests. If you remove the query strings as well, you can improve the gtmetrix score. For example, suppose there are 12 style files in the template, all of which need to be optimized and reduced in size, and in some cases, this effect is very significant, and only one tick optimizes WordPress with the WP Rocket plugin.
Optimizing CSS Files in WP Rocket
- Minify CSS files: with this option, empty spaces and comments are removed and the overall volume is reduced. Of course, as shown in the image, when you intend to activate this option, a warning will be displayed. Because it is possible by compressing the CSS file The overall style of the site is messed up. After activating this option, check the site. Disable if you encounter problems. If merging one of the CSS files with other files leads to a mess of your site, then you should find that file and exclude it from the text field section of CSS files excluded from other files.
- Optimize CSS delivery: By activating this section through render blocking, you can increase the site loading speed. This option is not recommended because if it is active, the content of the site will be loaded first without styling; Then the CSS will be loaded.
Optimizing JS (JavaScript) Files in WP Rocket
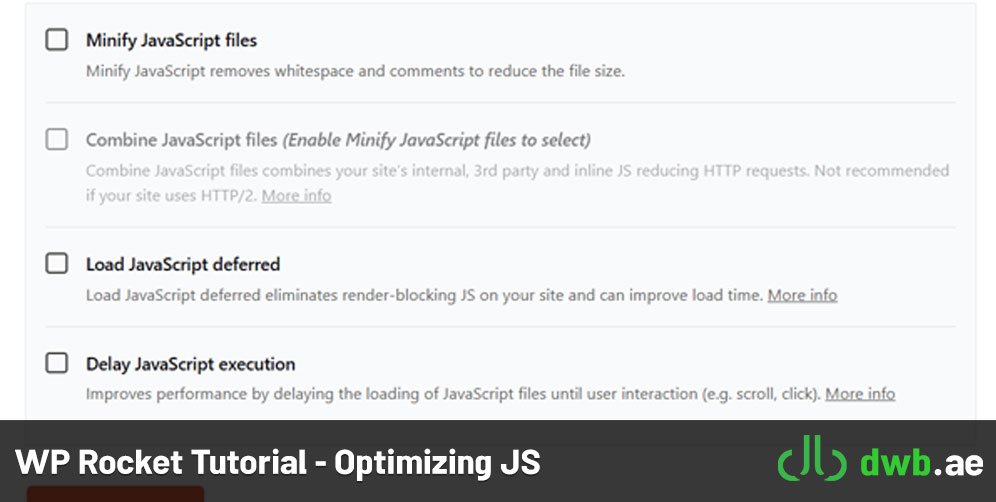
- Minify JavaScript files: Similar to the previous step, you will see a warning by selecting the option to compress JS files. Visit the site here after activation, if you see a problem, just disable the JavaScript file compression tick.
- Combine JavaScript files: In this section of WP Rocket tutorial, you can also combine JS files. To combine files, pay attention to the point mentioned in the CSS section.
- Load JavaScript deferred: We recommend using this option because this will load the content, images and CSS first and then load the java files. In this way, the site will have a good speed. Of course, if you have combined all the JavaScript files, you cannot delay the priority of executing the files in this section.
- Delay JavaScript execution: When you enable taht option in WP Rocket, the plugin modifies the way JavaScript files are loaded on your website. Instead of loading all JavaScript files immediately when a user visits a page, the plugin delays the loading of non-essential JavaScript until after the initial page content has loaded. This can help in rendering the visible parts of the page faster, providing a better user experience.
to click ” Save Changes ” button at the bottom of the page after making any changes.
After you have made the file compression settings in each section, click the site link in GT Metrics and check whether you have improved the speed of your site or not.
4- WP Rocket Media Optiomization Settings Tutorial
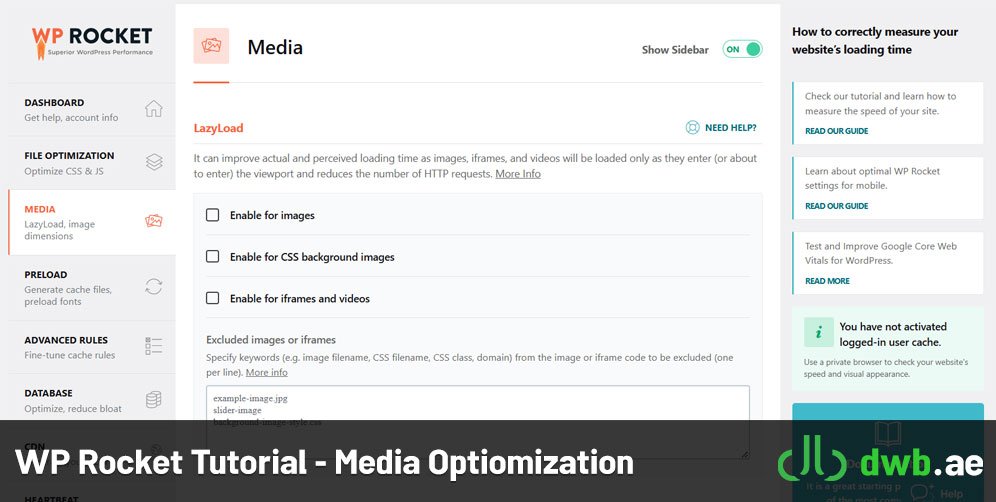
Media can be optimized in Rocket plugin training. We will optimize things like lazy loading in different media and embed with this tab.
- Lazy loading: In this section of the WP Rocket tutorial, you can enable Lazy Load for images, videos, etc. so that they load in less time.
- Image Dimensions: “Add Missing Image Dimensions” is a feature in the WP Rocket plugin for WordPress that helps optimize the loading of images on your website by automatically adding width and height attributes to image tags (HTML img elements) when they are missing.Including the width and height attributes in the image tags informs the browser about the size of the image before it is loaded. This information allows the browser to allocate the necessary space on the page for the image while waiting for it to download. As a result, it prevents layout shifts and improves the perceived performance of your website, contributing to a better user experience.
5- WP Rocket Preload Settings Tutorial

This tab loads the pages in advance in the host and as soon as the request is received in the host, it can be sent without spending time in processing the request. In addition, when you publish or update a post, tab, custom tab, category, tag, etc., it automatically clears the memory and replaces it with new content.
- Preload Cache: When you activate the Rocket plugin on the site for the first time, the first tick in the preloading section is activated automatically. The homepage and the links on it are loaded to ensure the speed of the site.
As you can see in the image, there is an option called “Enable sitemap-based cache preloading” in this section. By ticking, the bottom part of it, the Yoast Seo XML sitemap, will be activated (I use the Yoast plugin. Depending on the SEO plugin you use, the name of the sitemap may be different.). Therefore, Rocket automatically recognizes the sitemap generated by the Yoast plugin. By doing this you can check this option to preload. Enter the site map link in the desired box.
Default DNS request: If you use content from other sites on your site (for example, uploaded Google fonts or videos from YouTube), you may want to add the source domain to DNS requests. In the bottom box of this section, add the desired host in the following format:

6- WP Rocket Advanced Rules Tutorial
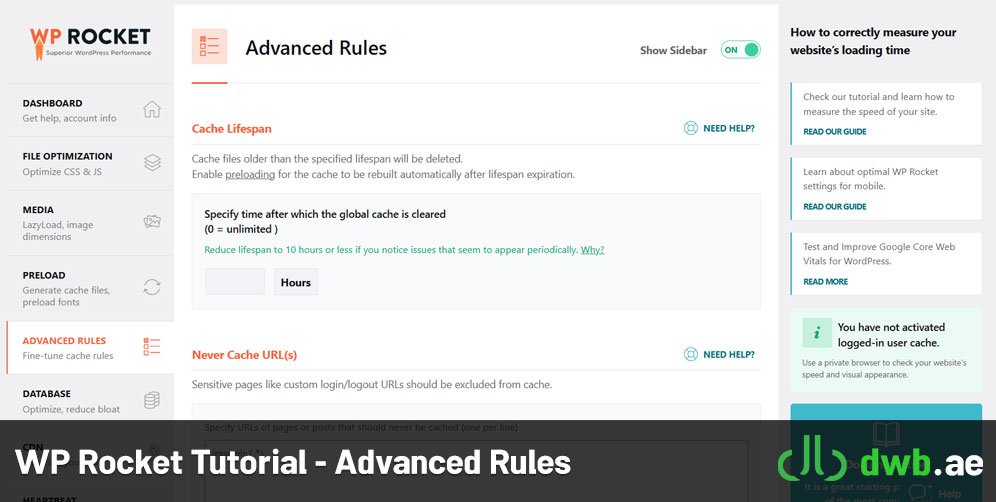
In this part of the tutorial on working with WP Rocket, apply exceptions for things you don’t want to be cached, such as addresses, cookies, user groups, etc.
In this part of the WP Rocket tutorial, all pages or sections that should not be cached are set, including the following.
- Never cache URLs: Protect sensitive pages like account or shopping cart from being cached using the box below this section.
- Never Cache Cookies: You can delete a specific set of pages using a simple Regex. For example:
/events/(.*)- Never Cache User Agent(s): Enabling taht option can be useful in various scenarios. For example:
- Dynamic Content for Specific User Agents: If your website serves different content or layouts for specific user agents, such as mobile devices or search engine crawlers, you might want to avoid caching for those user agents to ensure that each group gets the appropriate content.
- User-Specific Content: Some websites provide personalized content based on the user’s device or browser. By excluding specific user agents from caching, you can ensure that users receive dynamic, personalized content.
- Debugging or Development Tools: During development or debugging, you may use tools or user agents that you don’t want to be affected by caching. Adding those user agents to the “Never Cache User Agent(s)” list allows you to work on your site without interference from caching.
- Always Purge URL(s): In this box, you specify all the URLs that you want to be deleted from the cache when updating the post and page. jQuery cache strings: Rocket plugin does not cache pages that have query strings by default.
Although you can exclude any you wish using the box below this section.
These query strings contain an address that includes a question mark and parameter and value. Like the example below:
In this example, country is a parameter and UAE is a value:
https://dwb.ae/?country=UAE- Cache Query String(s): When you enable it, the plugin will include query strings when determining whether a page can be served from the cache. This means that if a URL has different query string parameters, WP Rocket will create separate cache files for each unique combination of query strings.
For example:
example.com/page

example.com/page?category=tech

example.com/page?category=sports
7- WP Rocket Database Cleaning Settings Tutorial
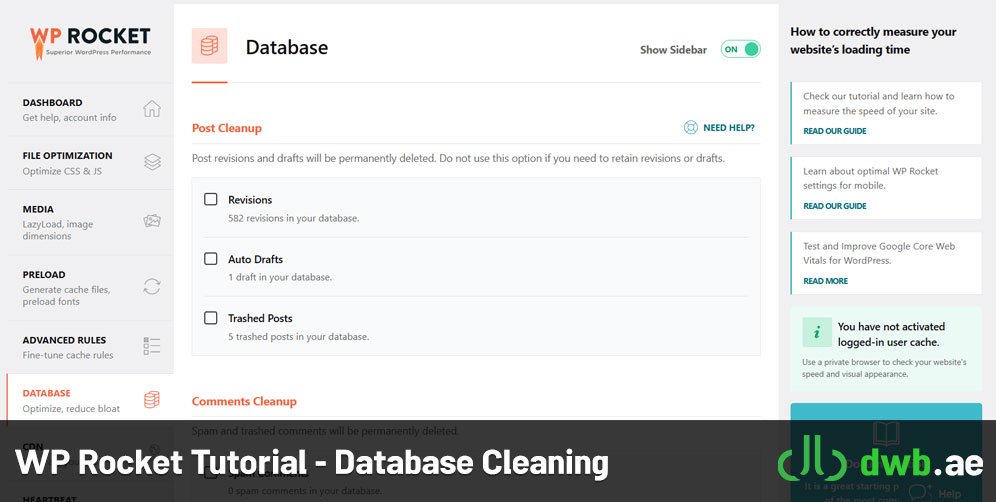
To increase the speed of the site, you can optimize your database in this part of the Rocket plugin tutorial. Cleaning and optimizing the database includes the following.
- Post Cleanup
Revisions: WordPress creates a separate copy or version in the database while writing an article. In order for their volume to be large in the long term and not to slow down the site, you should delete them. This option will automatically delete them from the site.
Auto Drafts: If you are writing an article, WordPress will automatically save your article every few minutes, and in this way, even if you have not hit the save button, you have access to the latest version. By activating this option, drafts that you don’t need will be deleted.
Trashed Posts: The posts you deleted from the site and moved to the trash are automatically deleted from the database with this option.
- Comments Cleanup
Spam comments: Spam comments are comments that are usually posted on your site by bots. In this part of the WP Rocket tutorial, they will be automatically deleted from the site by ticking this box.
Trashed comments: You may delete some comments that come to your site. Although these go to the trash; But they also occupy part of the database space. So, this option will help you to automatically remove them from the database.
- Clearing Transient Data
Transient data is information that exists in the database, but does not actually have a specific function on your site. So, deleting them will make the site lighter and faster. This option includes Expired Transient Data and All Transient Data, we recommend checking both.
- Database Cleanup includes the option to optimize the tables. In fact, with a command to MYSQL, it optimizes the tables for better loading faster.
- Automatic cleanup with the cleanup option, you request that automatic mode be used for all database optimizations mentioned in the previous sections. You can define the time period daily, weekly and monthly. Finally, be sure to click the optimization button so that both the changes are saved and the optimization is activated. Note that database optimization is very important. For this reason, we recommend that in addition to using this section of the Rocket plugin, you must read our guide on increasing site speed.
8- CDN Settings in WP Rocket
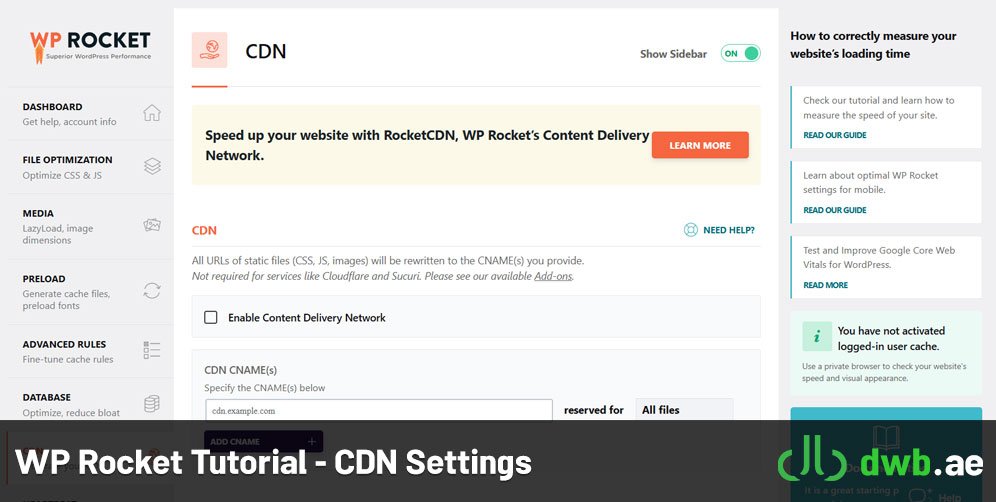
In this section of the Rocket plugin settings, you should use the CDN or content distribution network information you use in the plugin settings. CDN or Content Delivery Network is a service that increases the speed of sending information to visitors and greatly reduces loading time. The exact setting of this section depends on the CDN you use and the company providing this service. So, if you use this service, contact the relevant company for settings. If you use CDNs like Cloudflare, there is no need to register information, and we mean dedicated and public CDNs that have CNAME.
9- Heartbeat Settings in WP Rocket
Activating heart beat settings affects the consumption of WordPress web services resources. This section provides a connection for data transfer and synchronization between the server and the browser, and the things involved in the Heartbeat API:
- Auto save and revision in the post editor
- Notifications in the WordPress admin dashboard
- And …
In the WP Rocket tutorial, the API section executes a series of tasks at intervals, or ‘ticks’, every 15 to 60 seconds, using the admin-ajax.php file to perform this activity. This request can cause overload or high CPU consumption on some servers. Depending on the provider and host, it can lead to performance issues. To avoid such issues, WP Rocket provides a way to control this activity in our settings:
by enabling the Check Heartbeat option, you can choose to reduce activity, disable or limit the Heartbeat API. Of course, choosing the deactivate option is not recommended at all. Because it may affect the performance of plugins and themes. The reduce activity option is the best choice, because each of these tasks happens in 120 seconds instead of 15-60 seconds.
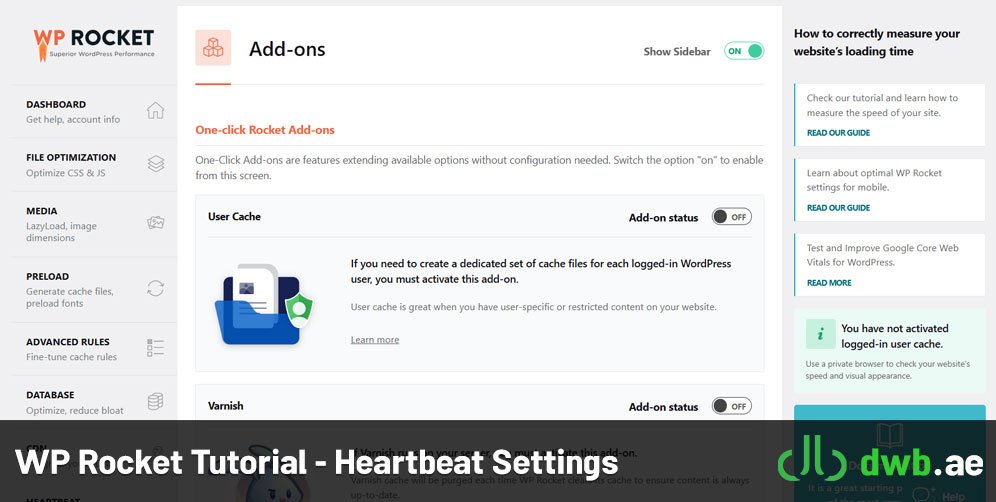
10- WP Rocket Add-ons

WP Rocket plugin can add more features to your site. Just turn on whichever one you want.
11- WP Rocket Tools
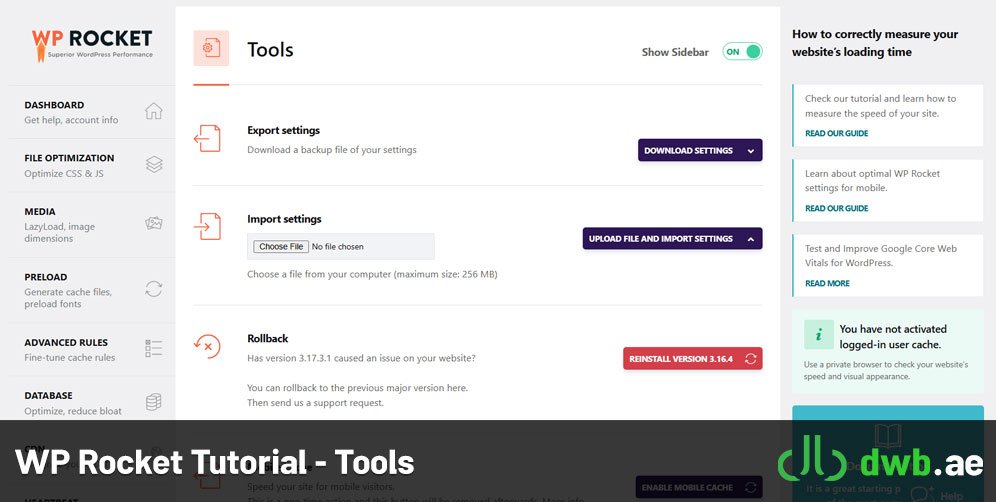
Like other plugins, this section is used for embedding and exporting. You can see sections such as export settings and import settings here.
I hope the WP Rocket tutorial is effective in optimizing your site speed. If you have any questions about the WP Rocket settings tutorial, you can ask them in the comments.